Showing posts with label devel. Show all posts

Friday, July 10, 2009

Ttk Tutorial Part 3: Popup menu

Purpose

In this third part of the tutorial I will deter from the usual path of taking on every standard widget and show you how to create a window with a popup menu using tkinter.ttk.

Difficulty: moderately easy (3/10)

Example: A window with popup menu

This example details how to create a root window class with a popup. The result will look like this:


Code for the example (gist):
    1 from tkinter import *
2 from tkinter.ttk import *
3
4 class root_window_with_popup(Tk):
5 def __init__(self):
6 Tk.__init__(self)
7 self.geometry('400x300')
8 self.title(__file__)
9
10 self.label = Label(self, text='Right click to show popup')
11 self.label.pack(anchor = N, fill=NONE, expand=YES, pady = 40)
12
13 self.popup = Menu(self, tearoff=0)
14 self.popup.add_command(label="Quit", command=self.destroy)
15
16 self.bind("<button-3>", self.do_popup)
17
18 self.mainloop()
19
20 def do_popup(self, event):
21 self.popup.tk_popup(event.x_root, event.y_root, 0)
22
23 if __name__ == '__main__':
24 root_window_with_popup()
Explanation of the code:

So what does the root window class do?
  1. (6-8) Call parent constructor, set size settings, set title.
  2. (10-11) Add a helpful label to the window that instructs what to do.
  3. (13-14) Create the menu, like in the previous example. It just is not nested here.
  4. (16) Call the do_popup callback method on the press of the third mouse button. Note: this is the first place I show the bind method. It is used to connect events with actions/methods, much like the command keyword for the menu entries.
  5. (21): Display the popup window at the position of the mouse (which is passed as event).

Commands reference
  • tkinter.Menu.tk_popup(x, y, entry='')
    • x, y: root coordinates of where to display the popup menu
    • entry: index of the entry which is selected

Thursday, July 9, 2009

Tkinter+Ttk Tutorial Part 2: Menu, label, packing and callbacks

Purpose

This article will show you how to structure a Tkinter+Ttk application, add a menu and tie the menu items with commands, one of which will create a Label in the centre of the window.

Difficulty: Moderate
Requirements: Python 3.1+ with tkinter and a little common sense

Building on the last part of the tutorial, this part goes deeper in the subject of GUI programming with tkinter+ttk: it shows how to accomplish something useful. You'll read about how to structure GUI code in pythonic OOP manner, create a menubar and assign or connect commands to the menu entries and create a Label and position it.

Example 1: A window with structured code

This example shows a slightly extended version of the minimal application you could read before. There are three additions and modifications:
  1. The code for the window class in this example will inherit from Frame class and extend it.
  2. The window gets it's file name as title displayed on the title-bar.
  3. It uses the geometry method to adjust the window size.
The results will look similar to the last example, just a little bigger and with a name on the top:
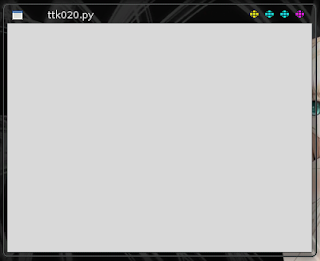


Note: From now on I will strip the comments from the blog version of the code and highlight the currently interesting code parts. The gist version has the comments.

Source code for ttk020.py (gist):
from tkinter.ttk import *

class App(Frame):
def __init__(self):
Frame.__init__(self)
self.master.title(__file__)

self.master.geometry('400x300')
self.pack()

self.mainloop()

if __name__ == '__main__':
App()

The above code does the following things:
  1. Import everything from the ttk module (it is designed so that this does not create conflicts).
  2. Create a class that inherits form the Frame class.
  3. Call parent constructor.
  4. Set the title of the window.
  5. Set the size of the window with the geometry command and tell the window to resize with the pack command.
  6. Run the main loop.
  7. The App class that inherits from the Frame class - our window - is then created when this script is called.
Note: Because I use the __file__ variable to set the title, this script will only work as file script, not on the interactive shell.

Example 2: Adding widgets and callbacks

This example extends the above application with a menu which items are bound to commands and it gets a label. The result will look something like this:
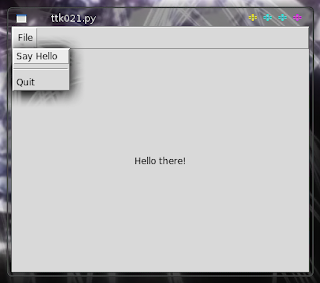


Source code for ttk021.py (gist with comments):
from tkinter import *
from tkinter.ttk import *

class App(Frame):
def __init__(self):
Frame.__init__(self)

self.master.geometry('400x300')
self.master.title(__file__)

self.pack()

self.menu = Menu(tearoff=False)
self.master.config(menu = self.menu)

fm = self.file_menu = None
fm = Menu(self.menu, tearoff=False)
self.menu.add_cascade(label='File', menu = fm)

fm.add_command(label='Say Hello', command = self.say_hello)
fm.add_separator()
fm.add_command(label='Quit', command = self.quit)

self.mainloop()

def say_hello(self, *e):
self.label = Label(self.master, text='Hello there!')
self.label.pack(anchor=CENTER, fill=NONE, expand=YES, side=LEFT)

if __name__ == '__main__':
App()

Explanation of the above code:
  1. The import section now also imports the tkinter module. This is done because the menu is defined there and not in ttk. Including the two modules this way will overwrite any new widgtes over the old and enable the new default theme for the looks.
  2. In the constructor of the App class now creates a menu and assigns it to the window with the config function. The tearoff parameter at creation adapts the looks.
  3. In the next block a cascade is added, which is the File menubar item you can click on to. Then it is assigned to the menu as child so that the application knows where to put it.
  4. The following block adds the "Say Hello", a seperator and the "Quit" menu items to the File menu. The command parameter defines what to do when the menu option is activated (clicked).
  5. The "Say Hello" option will call the say_hello callback method that is declared below the constructor. The "Quit" option will call the inherited quit callback from the Frame class and end the program.
  6. The callback when run creates a new Label with the text "Hello there!" and positions it in the centre of the window. The parameters for the pack method tell it where to place it. Anchor tells to put it in the middle, Fill tells that the Label itself should only use the space it needs and leave the rest alone, Expand tells the align context and side tells where the base point is. You'll see more packing later on.
Epilouge

This post showed how to add some basic widgets to the window and connect commands to menu items that do something. Next post will detail some more widgets and extend the window some more.

Tuesday, July 7, 2009

TkDocs first example in python 3.1

The following code does exactly the same as Mark Roseman's TkDocs A First (Real) Example. To match the other language examples, this code has no structuring. The Python way would obviously be to do this in a more OOP way.

So, here is the code (gist):

#! /usr/bin/env python3

# include tkinter packages
from tkinter import *
from tkinter.ttk import *

# create tk root class
root = Tk()

# create frame, add title and setup grid
frame = Frame(root, padding='3 3 12 12')
frame.master.title('Feet to meters')
frame.grid(column=0, row=0, sticky=NW)
frame.grid_columnconfigure(0, weight=1)
frame.grid_rowconfigure(0, weight=1)

# text entry
frame.feet = Entry(frame, width=7)
frame.feet.grid(column=2, row=1, sticky=W)

# calculated meters label
frame.meters = Label(frame, text='')
frame.meters.grid(column=2, row=2, sticky=W)

# calculate callback
def calculate(*e):
try:
frame.meters.config(
text = str(0.3048 * int(frame.feet.get()) *
10000.0/10000.0))
except:
frame.meters.config(text="")

# calculate button
frame.calc = Button(frame, text='Calculate', command = calculate)
frame.calc.grid(column=3, row=3, sticky=W)

# feet label
frame.flbl = Label(frame, text='feet')
frame.flbl.grid(column=3, row=1, sticky=W)

# is eq label
frame.islbl = Label(frame, text='is equivalent to')
frame.islbl.grid(column=1, row=2, sticky=E)

# meters label
frame.mlbl = Label(frame, text='meters')
frame.mlbl.grid(column=3, row=2, sticky=W)

# distance the widgets a bit
for w in frame.children.values():
w.grid(padx=5, pady=5)

# set focus to feet entry
frame.feet.focus()

# bind to calculate
frame.calc.bind("<Return>", calculate)

# enter main loop
root.mainloop()

Sunday, July 5, 2009

TTK Tutorial Part 1: Bare Minimum


Purpose


The first thing to do when trying out a new GUI toolkit is to get some visuals on the screen and play around with some minimal code to get a good base for further improvement. In this first part of the ttk tutorial I describe various ways to create the bare minimum window with the python tkinter.ttk module as an introduction to the series.

Difficulty: Easy
Requirements: Python 3.1+ interpreter compiled with tkinter

Since version 3.1 python adds the tkinter.ttk module which extends tkinter and uses the Tk 8.5 widget framework improvements including themes, anti-aliased fonts, transparency and new widgets. These improvements make the python standard library GUI part somewhat usable and much less ugly than before. It also eases portable GUI development and deployment. The main problem I see with it so far is the practically non existent documentation. Being a good hacker I scratch this itch of mine and write a tutorial series while exploring this topic.

Example 1: Clean and documented minimal application

This first example shows how to crate a minimal application with the new ttk widget set. The only thing this application does is create a root window and enter the main loop. The visual result looks something like this:


Code for the first example (gist) ttk010.py:
#! /usr/bin/env python3

"""
Minimal ttk application that only displays an empty window and runs the main loop.

What's it doing:
1. Create root frame
2. Run application main loop
"""

from tkinter import ttk

frame = ttk.Frame()
frame.mainloop()

Example 2: More minimised version

Here is a second example that does the same thing without comments and execution parameters. You'll have to execute it with the interpreter. Something like "$ python3 ttk011.py".

Code for the second example ttk011.py:
from tkinter import ttk
ttk.Frame().mainloop()

Example 3: Even more minimised version

Another, even smaller variation of the code -- to give the title of the article meaning and play around a bit -- is a one liner. I use the inbuilt __import__ function for it and it makes the code quite ugly too, so it is mainly of educational interest.

Code for the third example ttk012.py
__import__('tkinter', fromlist=['ttk']).Frame().mainloop()

Example 4: System shortcut

To show another perspective, the final example aims for the minimal hassle design target. This example can simply be run in a terminal:

Code for the last example ttk013.py
echo "__import__('tkinter', fromlist=['ttk']).Frame().mainloop()" | python3

Epilogue

The purpose of this post was to create a kick off point for ttk development and play around with the basics to make you comfortable with the framework. In the next post of this series I will do some structural organisation on the code to create something maintainable in the long run and add some more widgets.

Tkinter+Ttk Tutorial Part 2: Menu, label and callbacks.

Wednesday, July 1, 2009

Python and Bash slow print function

I always liked to toy with slow printing terminal functions that have a small delay between each character (a bit Matrix style). Here is the Python 3 version:

Syntax highlighted version here.


#! /usr/bin/env python3

import os, sys, time

def dprint (message, delay=0.1):
"""
Prints message with delay between each character.
"""
for char in message:
sys.stdout.write(char)
sys.stdout.flush()
time.sleep(delay)

if __name__ == '__main__':
"""
Demonstration logic.
"""
os.system('clear')
dprint('This message is printed slowly and demonstrates the slow\n' +
'print function.')


Below is an older version written as a bash shell script which does the same.

Syntax highlighted version here.


#! /bin/bash

mm_decho ()
{
local i stepping
stepping="0.01"

# When first argument is empty or not given, it just echoes a new line
# and leaves.
if [ ! "$1" ]; then
echo
return
fi

# If a second argument is given (delay stepping), check it for validity
# (if it is a float) and set stepping according to the argument.
if (( $# > 1 )) &&
[[ ($2 = $(echo $2 | grep -oE '[[:digit:]]')) ||
($2 = $(echo $2 | grep -oE '[[:digit:]]+\.[[:digit:]]+')) ]]
then
stepping="$2"
# In case the previous test failed, but we have a second argument,
# meaning it is invalid, just print the message, complain a bit and then
# quit the function with false.
elif (( $# > 1 )); then
echo "$1"
echo ".! mm_decho() oops: second argument is invalid!" 1>&2
echo ".! must be /float but is: \"$2\", leaving function.." 1>&2
return false 2>/dev/null
fi

# Do delayed printing of first input argument. Calculate the
# length of first arg. and substract one. Then make it a /for/
# sequence going through all the characters of the string,
# printing these and wait the delay stepping time.
for i in $(seq 0 $((${#1}-1))); do
echo -n "${1:$i:1}"
sleep $stepping
done
echo
}


mm_decho "Should be ok, default.."
mm_decho "Should be ok, costume stepping.." "0.05" "some more arg"
mm_decho "Should be ok, costume stepping.." "0.05"
mm_decho "" "0.3"

Tuesday, June 30, 2009

Projgen setup on Ubuntu 9.04 (Jaunty)

Just surfed around some news sites and stumbled upon the moblin (Intel's netbook Linux) site, as the 2.0 release is due. In the dev. section of the site I found projgen, a C/C++/Python project generator based on autotools and GTK. It actually has a nice GUI, though it is still *very* unstable. Now I had some hassle to get it running in the first place, so now I describe what did the trick until it will be fixed:

Note: You'll need git to fetch the sources, if you don't have them, sudo apt-get install git .

First I went to the project site: http://moblin.org/projects/linux-project-generator and did what was written there:

Opened a terminal and fetched the sources: git clone git://git.moblin.org/projgen.git

Installed the stuff that is listed there: sudo apt-get install libmagic-dev libglade2-dev libglib2.0-dev libgconf2-dev libxml2-dev

Entered ./autogen.sh , as it was described, which imediately bitched about missing libtoolize and gtkdocize , which I did not found as packages either. The right packages are: libtool and gtk-doc-tools . Installing these with sudo apt-get install libtool gtk-doc-tools will solve the problem.

Now autogen and
./autogen.sh
make
sudo make install

Now everything is in place, but running projgen will still bitch about a missing libprojgen.so.0, wich is located at /usr/local/lib . To make it work, you have to add it to the ldconfig thing. Do this by adding the path to a etc config file: sudo echo '/usr/local/lib' > /etc/ld.so.conf.d/projgen.conf and then update the cache: sudo /sbin/ldconfig .. Now you can run projgen.

As mentioned, it is still quite not mature right now.

Linux / *NIX minimal daemon code

Here is my minimal daemon code I wrote for Python 3. It is very minimal, but it works fine and can be easily extended.

Syntax highlighted version here.

#! /usr/bin/env python3

"""
Linux / *NIX daemon base code.

This script daemonizes its self with the start option and kills an already
running daemon with the stop option. It's kept minimal and simple, but it works
and can be extended/re-factored as base-code for a useful daemon.

Note: point of daemons is that they are quite and run in the background, add
some logging if you are developing a daemon, saves a lot of headaches.
"""

import os, sys, signal

PIDFILE = '/tmp/mydaemon.pid'

def daemonize(pidfile, workpath='/'):
pid = os.fork()
if pid > 0:
sys.exit(0)

os.chdir(workpath)
os.setsid()
os.umask(0)

pid = os.fork()
if pid > 0:
sys.exit(0)

sys.stdout.flush()
sys.stderr.flush()
si = open(os.devnull, 'r')
so = open(os.devnull, 'a+')
se = open(os.devnull, 'a+')
os.dup2(si.fileno(), sys.stdin.fileno())
os.dup2(so.fileno(), sys.stdout.fileno())
os.dup2(se.fileno(), sys.stderr.fileno())

pid = str(os.getpid())
with open(pidfile,'w+') as f:
f.write(pid + '\n')

def cleanup_handler(signum, frame):
os.remove(PIDFILE)

if __name__ == '__main__':
if sys.argv[1] == 'start':
if os.path.isfile(PIDFILE):
sys.stderr.write(
'pidfile found, daemon already running?\n')
sys.exit(2)

signal.signal(signal.SIGTERM, cleanup_handler)
daemonize(PIDFILE)
# daemon program logic
signal.pause()

elif sys.argv[1] == 'stop':
try:
with open(PIDFILE,'r') as pf:
pid = int(pf.read().strip())
except:
raise Exception('no pid found, daemon not running?')
os.kill(pid, signal.SIGTERM)

Monday, June 29, 2009

Work session start/end script

There is a set of repetitive tasks I do when I develop something, like check-in, off-site backup, archive integrity checking, etc. To automate this, I wrote a little script that I invoke when I start and stop to work on something for this purpose. The start and end functions should be adapted to personal needs, this one is a bit bare-bone.

Here is what it looks like (syntax highlighted version here):

#! /usr/bin/env python3

"""
Work session start/end script.

This script contains the routines that should be performed before and after a
work session and log it. Currently these are git repository integrity checking
for start up. Change commiting and backup for end of session.

Uses 'rsync' for backup and 'git' for revision control, make sure they are in
place.

The BACKUP_PATH has to be adapted to the syncronization target.

This script is quite safe to use.
"""

import os, sys, subprocess, time, datetime

BACKUP_PATH = '/media/disk'
LOGFILE = 'session.log'

def log(message, logfile=LOGFILE):
timestamp = str(int(time.mktime(datetime.datetime.now().timetuple())))
name = os.path.basename(__file__)
with open(logfile, 'a') as f:
f.write('[' + timestamp + '] ' + name + ': ' + message + '\n')

def start():
status = subprocess.call(['git', 'gc'])
if status != 0:
print ('!! something went wrong with the repository checking!')
print ('(recheck manually with git fsck and restore integrity)')
sys.exit(1)

log('session started')

def end():
os.system('git add .')
os.system('git gui')

if os.path.isdir(BACKUP_PATH):
os.system('rsync -a . ' + BACKUP_PATH)
else:
print('backup path not existent, backup aborted..')

log('session ended')

if __name__ == '__main__':
usage = ('Usage: session.py start|end\n' +
' start: start session\n' +
' end: end session\n')

os.chdir(os.path.abspath(os.path.dirname(__file__)))

if len(sys.argv) == 1 or (
sys.argv[1] != 'start' and sys.argv[1] != 'end'):
print(usage)
sys.exit()

if sys.argv[1] == 'start':
start()
elif sys.argv[1] == 'end':
end()

Sunday, June 28, 2009

.gitignore based clean script

This administrative development script reads the .gitignore file and removes the patters found there from the directory tree. Useful housekeeping script, but also quite powerful, use with care.

Syntax highlighted version here.


#! /usr/bin/env python3

"""
Clean script based on .gitignore file, the 'find' and 'rm' command. It has to
be located in the same directory as the .gitignore file.

This script reads the .gitignore file, parses the patterns found there to a
shell remove command and then executes it.

- With the 'dirs' option it also removes directories.
- With the 'debug' option it just prints the command it would execute and exits.

Uses the 'find' and 'rm' Linux / *NIX / OS X commands, which restricts it to
these platforms.

Note: be careful with this script, it's quite powerful.
"""

import os, sys

def change_to_file_dir():
os.chdir(os.path.abspath(os.path.dirname(__file__)))

def read_clean_patterns():
try:
with open('.gitignore', 'r') as f:
clean_patterns = f.readlines()
except IOError as err:
sys.stderr.write('Could not open .gitignore file: ', err)
sys.exit(2)
return clean_patterns

def create_clean_command(clean_patterns):
clean_patterns = ['-o -name "' + item.replace('\n', '') + '" '
for item in clean_patterns]
first = 0
clean_patterns[first] = clean_patterns[first].replace('-o ', '')
clean_command = str()
for x in clean_patterns:
clean_command += x
if len(sys.argv) > 1 and sys.argv[1] == 'dirs':
clean_command = ('find . \( ' +
clean_command + '\) -exec rm -vrf "{}" \;')
else:
clean_command = ('find . \( ' +
clean_command + '\) -exec rm -vf "{}" \;')
return clean_command

if __name__ == '__main__':
if (len(sys.argv) > 1 and
sys.argv[1] != 'dirs' and
sys.argv[1] != 'debug'):
print('Usage: clean [dirs] [debug]')
print(' dirs: recursive, remove directories too')
print(' debug: only print command, don\'t execute')
sys.exit()

change_to_file_dir()
clean_patterns = read_clean_patterns()
clean_command = create_clean_command(clean_patterns)
if sys.argv[-1] == 'debug':
print ('Clean command is:', clean_command, sep='\n')
else:
os.system(clean_command)